Halloween nail arts can be great fun to sport. You can try these nail arts for not just Halloween but also costume parties. Today, I will show you two easy-to-do Halloween nail art tutorials.
How To Do Halloween Nail Art
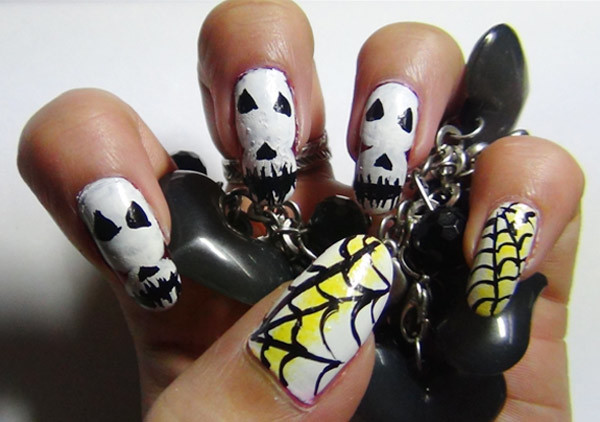
1. Skulls And Spider Web Spooky Halloween Nails:
Spider webs look very good on long nails. Skull designs are very easy to create.
Things Needed:
- Base coat (optional)
- A dark polish like maroon or red
- White nail polish
- A thin nail art brush
- Acrylic color in black and white
- Yellow nail polish
- A piece of sponge
- A transparent top coat
Step 1:
- Use a base coat first to prevent nails from chipping and staining.
- You can use a skin coloured nail polish after this to make the base more opaque.
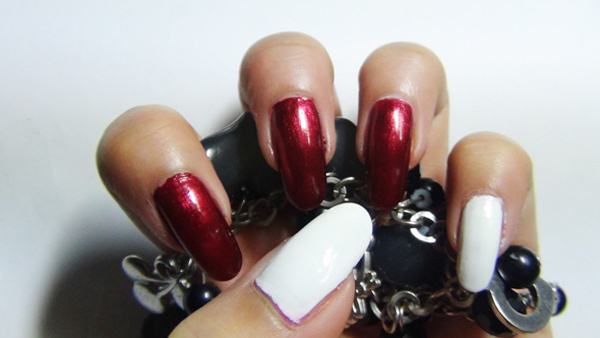
- After your base coat dries, use maroon nail polish (or red) on 3 finger nails like I have shown above.
- Use white nail polish for the other two finger nails.
Step 2:
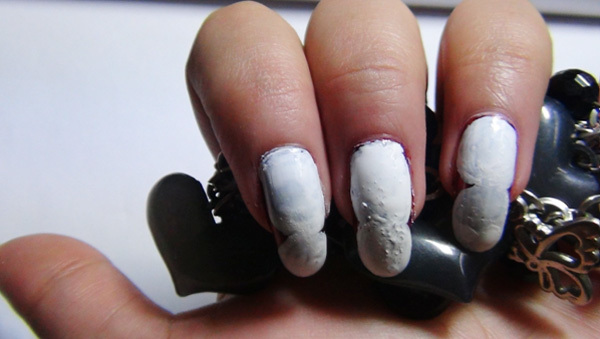
- Take your nail art brush and white acrylic paint to make joined big circles like I have done before.
- The circle doesn’t have to be perfect. You can also draw up rounded edge rectangles.
- Since the background maroon colour will almost be covered, you need not necessarily have to use red or maroon colour as the background.
- You can use any dark coloured nail polish for the background like black or dark green.
Step 3:
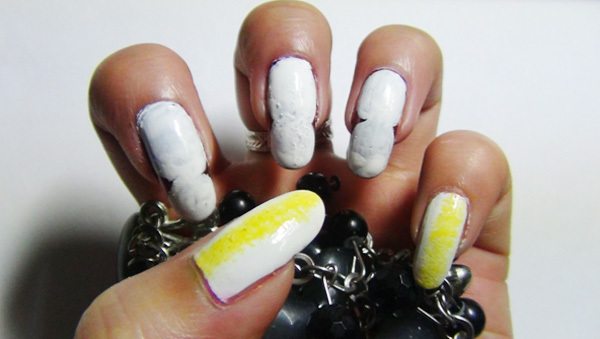
- Take the piece of sponge and yellow nail polish.
- Give a sponging of yellow at exactly the centre of two finger nails.
Step 4:
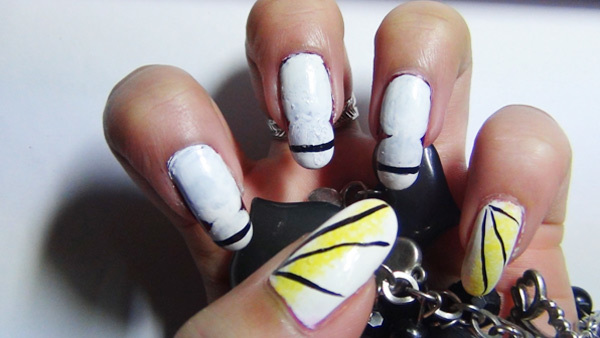
- Take black acrylic polish and your thin nail art brush.
- Make lines for spider webs coming diagonally from a chosen corner.
- Give a stripe of black horizontally for the mouth of the skulls.
Step 5:
- Draw up some triangles for the nose and eyes of the skulls.
- Give small vertical stripes to complete the mouth.
- Make curves convex to the web centre. Let this dry.
- Cover with a top coat and it’s done.
[Read:Nail Art Spas In Kolkata]
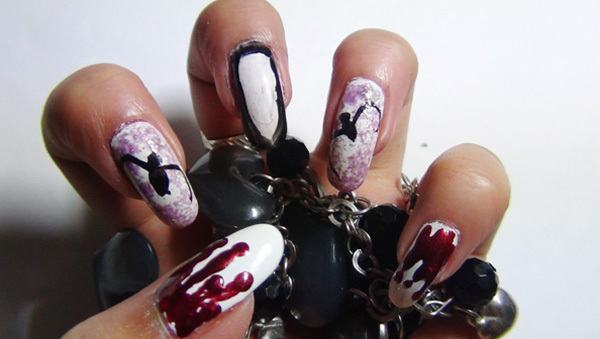
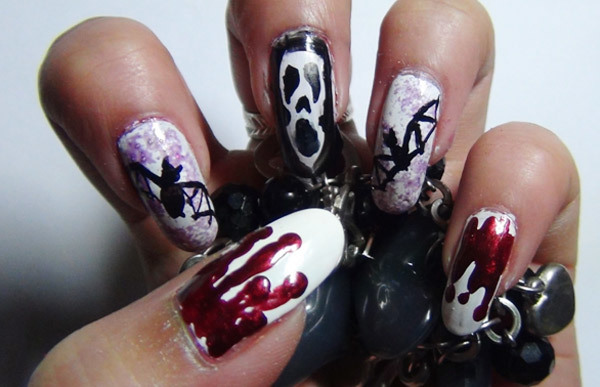
2. Spooky Bats, Dripping Blood And Masked Killer Nail Art:
When it comes to scary movies, almost everyone has a favorite masked killer. I preferred to draw up the masked killer from the movie ‘Scream’. Halloween nail art can very well use some blood dripping nails too. Instead of doing spider webs, I followed a similar technique to draw up 2 bats.
Things Needed:
- Base coat (optional)
- White nail polish
- Black nail polish
- Thin nail art brush
- Purple nail polish
- Black acrylic paint
- Blood red nail polish of your choice or a maroon nail polish
- A transparent top coat
- A piece of sponge
- Dotting tools
Step 1:
- Use a base coat.
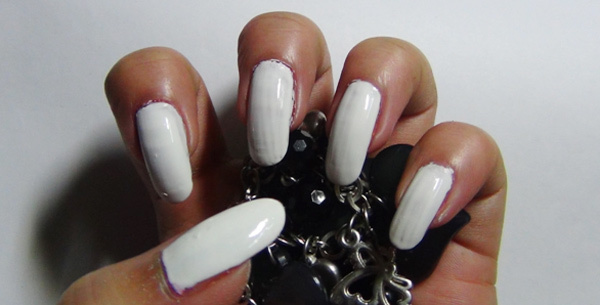
- Follow it up with 2 or 3 coatings of white nail polish. Let it dry up completely before moving on to the next step.
Step 2:
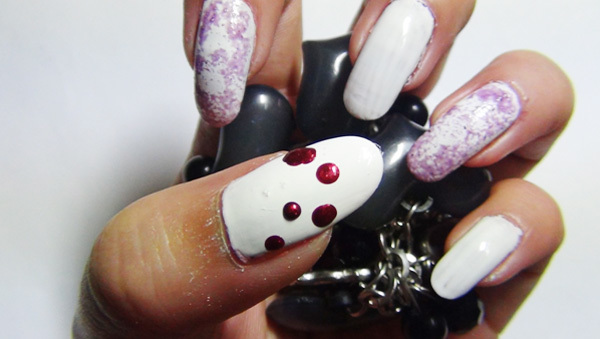
- Take your dotting tool and give a few dots on to the thumb. It can be uneven.
- On the other two nails, sponge up purple nail polish.
Step 3:
- Take your black acrylic color and thin nail art brush.
- Use the color to draw up a petal shaped body and a round head for the bats.
- Make two stripes like hands coming out of the body with your nail art brush. This will become wings in next step.
- Use your black nail polish to cover the white polish in the middle finger from the sides. Leave enough space inside.
- Use the red/maroon nail polish to drag the lines upwards creating blood dripping nails.
- Repeat the same for the last finger as well.
Step 4:
- Take your black acrylic paint and nail art brush.
- Make eyes, nose and mouth for the masked killer.
- Also make more stripes for the wings of the bats.
- Join the stripes to complete the wings.
- Give the pointed ears of the bats. You design is complete.
- Let this dry up completely.
- Now, use transparent polish to seal the design.
Hope you enjoyed the Halloween nail art designs. They are simple to make and look amazing. I’m sure you would love to try them out!


0 comments:
Post a Comment