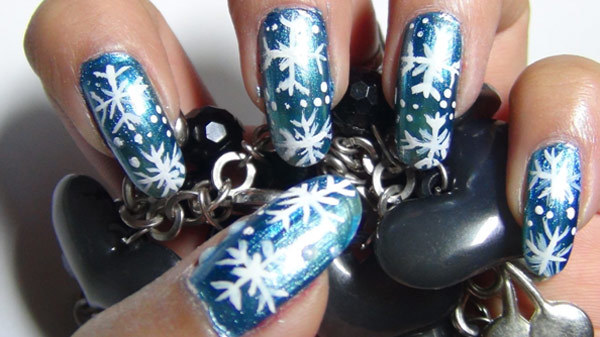
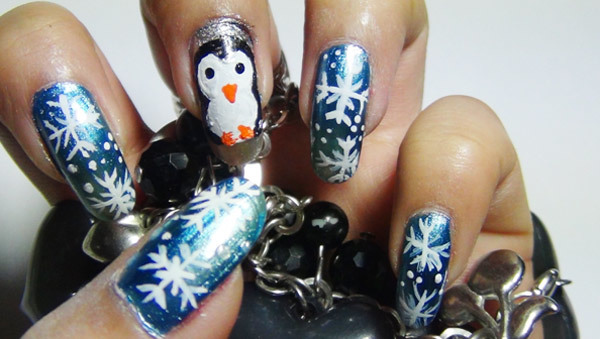
Winter is the perfect time of the year to sport some snowflake nail art. They look very ‘cool’ and you can also sport this for Christmas. The method to draw up snowflakes is very easy. You will just need to follow a simple technique. I have created an easy snow flake nail art and additionally modified it to create a snowflake penguin nail art too!
Both the nail arts are easy to do even for beginners. Let us take a ride through the world of snowflake nail art. I promise you will enjoy the ride as well as the final destination.
Snowflake Nail Art Tutorial
Things required:
Tip: If you don’t have a shimmery metallic blue nail polish, you may use a dark blue nail polish. Let it dry and sponge up any shimmerysilver nail polish on it. It will create a metallic blue nail polish-just the way we want it. Finally when your nail art is done and you have applied topcoat, the shine will be more pronounced.
[ Read: Nail Art Brushes ]
A. Simple Snowflake Nail Art:
This is a very simple snowflake nail art design. You can additionally add some loose glitters to it or nail art sequins to make it look more gorgeous. I prefer to keep it simple. However, I do use some tiny dots here and there to represent snow.
Step 1:
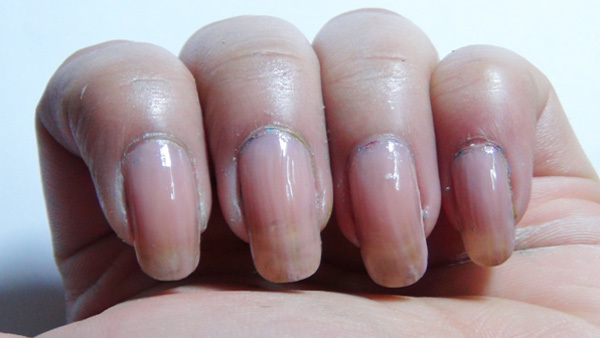
Use a base coat to prevent your nails from staining from the acrylic colors. If your nails are dry or prone to breakage, then base coat becomes doubly important.
(However, if you have strong nails, then you can forego the base coat.) Let it dry completely. When dried, use a skin coloured nail polish as a second protective layer and to make the nails more opaque.
[ Read: Blue coloured nail polish ]
Step 2:
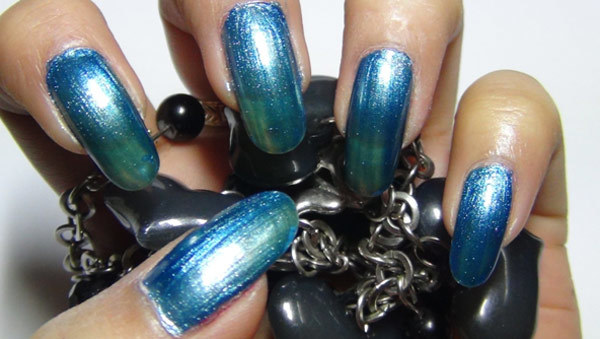
When the skin coloured nail polish is dried, use 2 coats of the metallicblue nail polish.
Step 3:
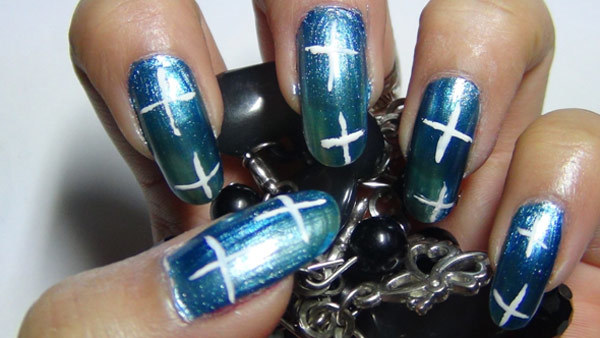
When the metallic blue nail polish is dry, take your nail art brush and white acrylic paint. Draw up designs like the ones shown here. These are simple cross or plus sign designs.
Step 4:
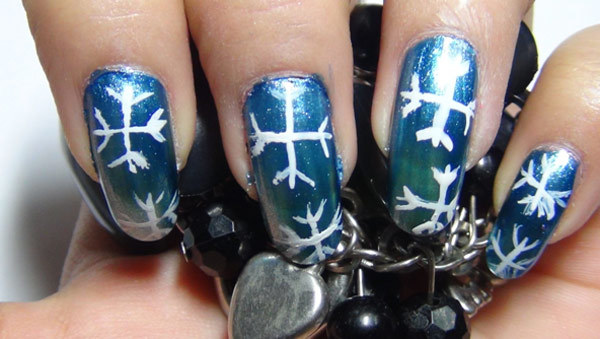
Follow the designs so created by adding a “v” on the 4 ends.
Step 5:
Now add 4 small lines in the spaces left. Follow up with some dots using a toothpick. Your snowflake nail design is now complete. Let it dry and then use a transparent top coat. You can also use a glittery top coat if you wish.
B. SnowFlake Penguin Nail Art:
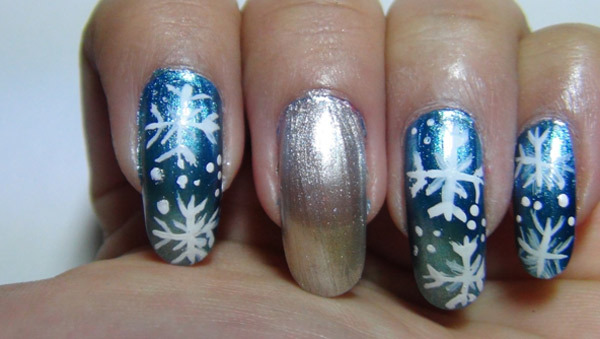
Follow the same technique for creating the snowflakes as shown above. I will now show you how to create the penguin nail art in the following steps.
Step 1:
Use a light base colour for the nail on which you want the penguin. I have used a silver nail polish.
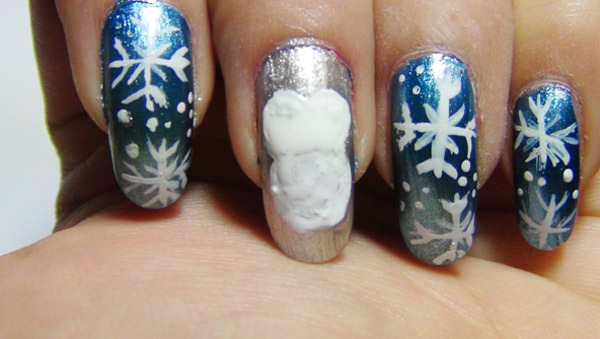
Step 2:
Now use your nail art brush and make a design in white like below. You can also use your dotting tools to create two big joined dots.
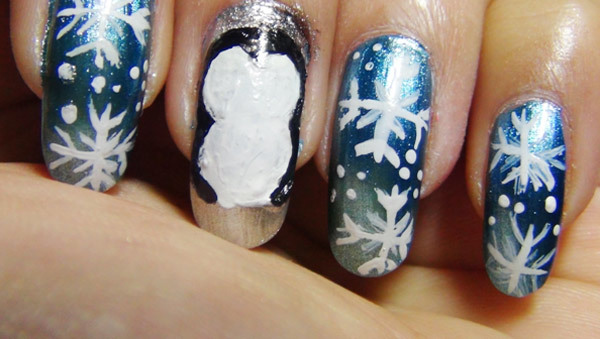
Step 3:
Now take your black acrylic colour and a nail art brush to create a pattern surrounding the white like the picture below.
[ Read: Nail Art Games For Girls ]
Step 4:
Now take your toothpick to create two dots in black to represent the eyes. Clean the nail art brush. Now use it to make the beak of the penguin and legs using orange colour. It should look this illustration when completed. Let it dry completely before applying top coat.
These two designs are super funky and ‘Christmassy’! Sported along with trendy winter clothing, these nail arts will make your winter look complete. You can sport these snowflake nail art designs with all kinds of winter outfits. Hope you enjoyed both the tutorials. Do try them at home. They are easier than they look. Give them a shot and do provide your feedback.


0 comments:
Post a Comment