Top 10 Most Common Makeup Mistakes You Usually Commit

We all have our flaws. Even the most beautiful amongst us can rattle off a list of all that they dislike about their face. These imperfections make us more beautiful and human. But we do want to hide some of these imperfections. Dark circles, pigmented skin etc. are things that are better hidden. So what is the solution? Yes, makeup can transform a seemingly ordinary face to look like a diva. Applying makeup in a proper manner can not only hide the flaws but can also highlight all that is beautiful in our face.
Unfortunately, very few of us really know what applying make-up properly entails. Most of us make several fashion faux pas’. So the first step in applying makeup right is to understand the mistakes we make. Here is a list of the most common makeup mistakes that women tend to make:

Biggest Makeup Mistakes that are Common

1. Applying Makeup on Dry Skin:

Makeup on Dry Skin
Image: source
Applying makeup on a dry skin can make the face look dull, cracked, old and tired. Everything good is built on a solid foundation, in this case, a properly moisturized face! So ensure that your face is properly hydrated before you apply makeup.
[ Read: Makeup ]

2. Eyebrow Disaster:

Eyebrow Disaster
Image: source
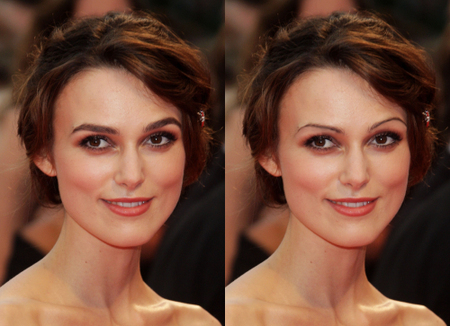
They say that the eyes are the window to the soul. Shapely, trimmed eyebrows can highlight the eyes and make them look even more beautiful.
Bushy, untrimmed eyebrows can make you look unkempt. Very thin, badly shaped or darkly penciled eyebrows are the worst eyebrow disaster one can have. Get professional help to get your eyebrows done. A good professional will be able to shape your eyebrows to suit your face.

3. Clumpy Eyelashes:

Clumpy Eyelashes
Image: source
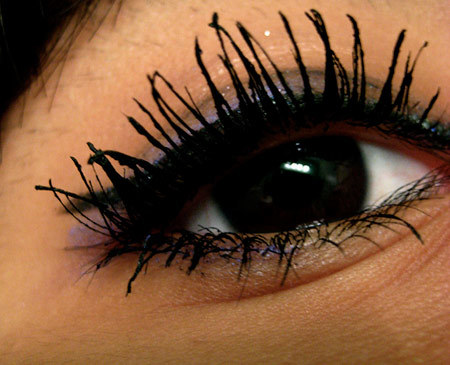
Mascara is used to further enhance the beauty of the eye. Wrong application of mascara can make your eyelashes look messy. Sometimes, we are unable to judge the amount of mascara needed and end up applying a thick coat, which makes the eyelashes looks very clumpy.
The first step to rectify these ‘mascara disasters’ is to buy mascara that is two shades darker than your eyebrow. And never, ever apply more than two coats or else you will end up with clumpy and messy lashes. Using mascara which is more than three or four months old can also make your eyelashes look clumpy.

4. Smudge Eyeliner:

Smudge Eyeliner
Image: source
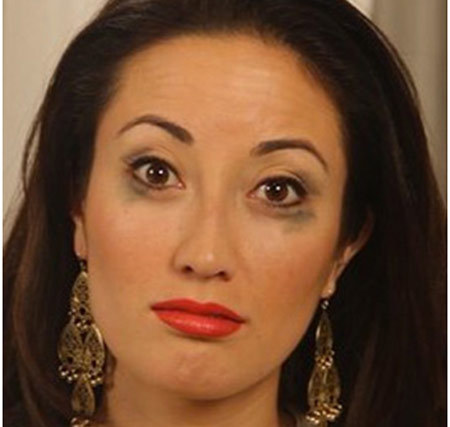
The morning after look might look sexy on the fashion ramp, but in real life it simply looks messy.One of the most common makeup mistakes women make while applying eyeliner or kohl is applying a bit too much of it! This excess liner or kohl tends to smudge and give the appearance of dark circles. So, be careful while applying eyeliner and be moderate with its thickness.
[ Read: Eye shadow ]

5. Wrong Foundation:

Wrong Foundation
Image: source
How many times have you seen a woman with a patchy looking face? More often than not, this kind of patchiness is the result of applying the wrong shade of foundation or applying too much foundation.
Do a little test to select the shade that is just right for your skin. Apply a little of the foundation you intend to buy on your cheeks (and not your wrists). If the foundation disappears into your skin then you have hit the jackpot and found the right shade!

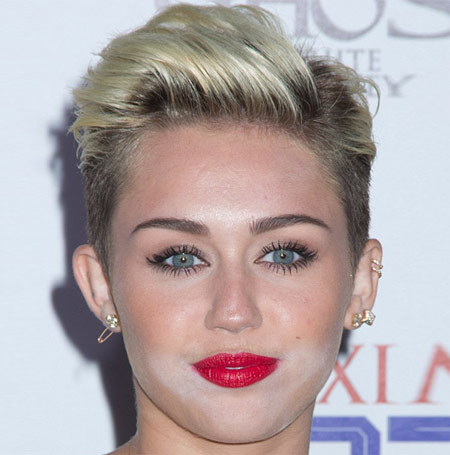
6. Too Much Powder or Blush:

Powder or Blush
Image:source
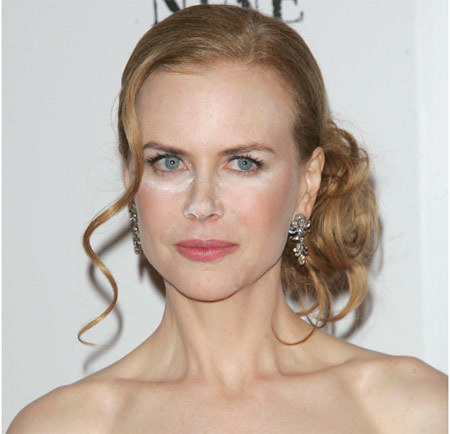
Some women try to achieve a fairer looking face by dabbing powder on their face. What they end up with, unfortunately, is a face that looks like a mask! Same thing goes with applying too much blush. If you really want to use a powder, go for the one nearest to your skin tone. The powders generally used are white in color and look completely unnatural when applied on the face. When it comes to a blush, keep a variety of shades to suit different occasions but make sure these shades suit your natural skin tone.

7. Using Makeup That’s Not Age-Appropriate:

Age-Appropriate
Image: source
Yes, age is just a number and you are as old as you feel but when it comes to makeup, it’s the physical age we are bothered with! An adult with makeup of a teen will stand out like a sore thumb. Same thing goes for young teenagers all made up like an adult. So be fair to yourself. Apply makeup that is age appropriate and you will really look like a million bucks.
[ Read: Loreal Makeup Kit ]

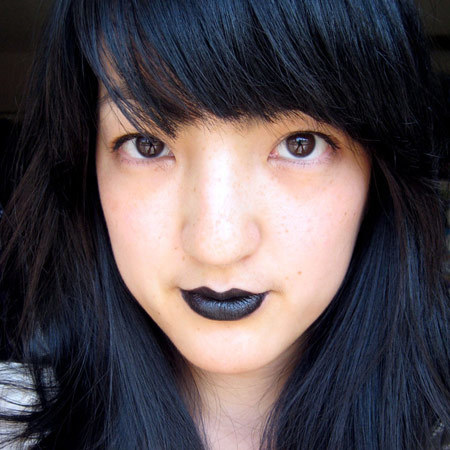
8. Too Dark Lipstick or Lip Liner:

Dark Lipstick
Image: source
Not everyone can carry off a dark lipstick. Undoubtedly, when done right, a face can look intense and glamorous with a dark lipstick and lip liner. But most women tend to overdo it and end up looking unnatural. Also, never apply lipstick on dry, flaky lips. Remove all flakes and moisturize your lips before you apply lipstick.

9. Improper Blending Techniques:

Blending Techniques
Image: source
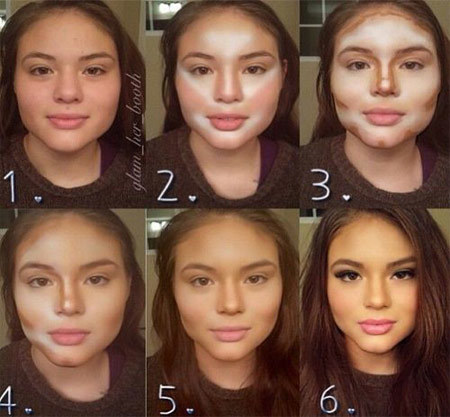
Makeup is not about dabbing a bit of blush here and a bit of eye shadow there. A makeup that is well done will make you look beautiful and natural. The secret lies in the art of blending. Makeup not blended properly looks, well, comical! Use good quality makeup and the right tools of the trade – sponges, brushes, wedges etc. Watch a few good makeup videos and learn how to blend your makeup properly.

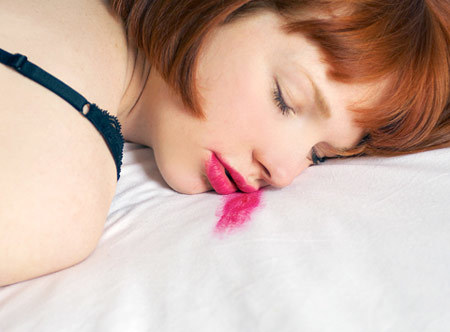
10. Sleeping With Makeup:

Sleeping With Makeup
Image: source
I understand being tired after a hectic day at work or a party. But there are no excuses for going to bed with your makeup on! This is the biggest mistake most women make. If you want to keep your skin healthy and beautiful, wash off your makeup before you go to bed. Not doing so can make your skin dry, prone to allergies, infections and acne.
[ Read: Best Nail Polish Removers ]
You should be your biggest fan! Fall in love with yourself. All those flaws you dislike? Hide them with the use of makeup. But don’t forget – know your skin type, buy makeup that suits your skin the best, avoid these top makeup mistakes, drink plenty of water and voila! You are now a makeup expert.
2 Amazing Disney Nail Art Tutorials – With Detailed Steps And Pictures

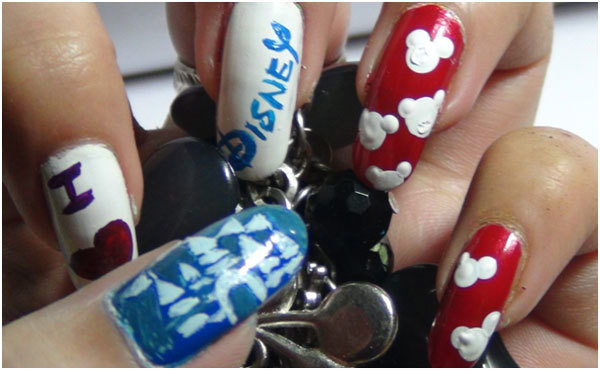
We are all fans of Disney movies and cartoons. It’s time we create some Disney nails. Here we give two creative Disney nail art tutorials in a stwepwise manner for you to try.

Disney Nail Art Tutorial

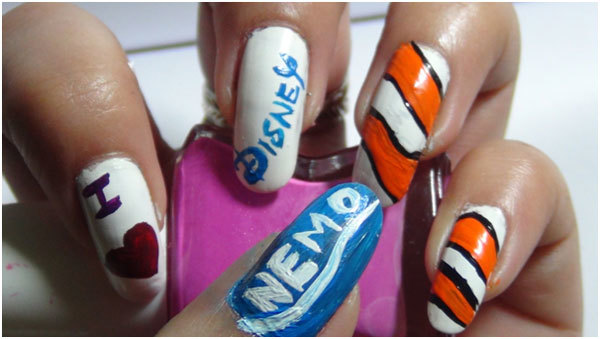
A. Disney and “Finding Nemo” nails:

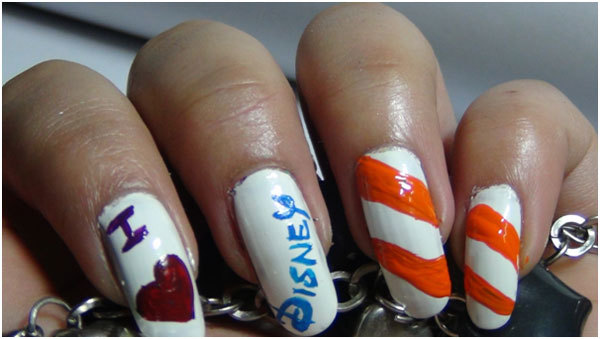
This Disney nail art is inspired by the very popular Disney film, “Finding Nemo”
Things required:
  • Base coat (optional)
  • White nail polish
  • Red and blue nail polish
  • Acrylic colours in white, blue, orange, purple, red and black
  • Dotting tools
  • Thin nail art brush
  • Transparent polish 
[ Read: Nail art ]
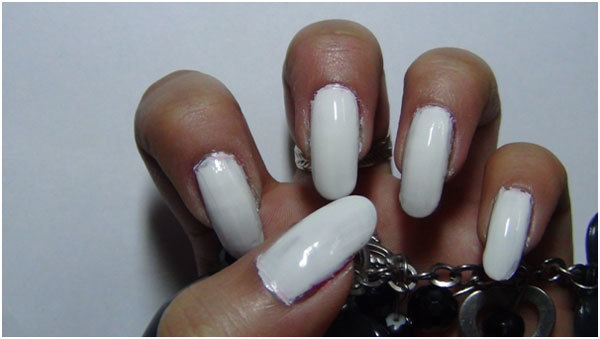
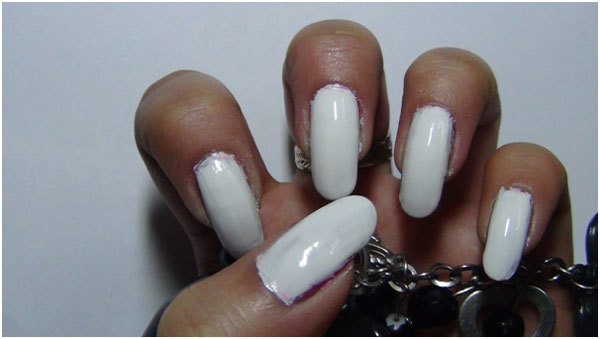
Step 1: Use a base coat to prevent your nails from chipping. Base coat will also strengthen the nails and save them from harmful effects of acrylic colors. Let it dry. Follow up by using 2 coats of a good white nail polish. Let your nails dry before moving on to step 2.
Nail Art Tutorials 1
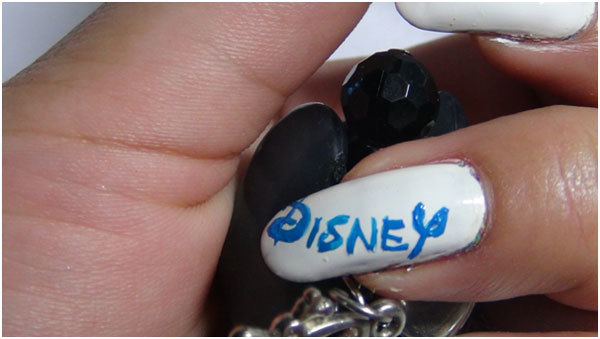
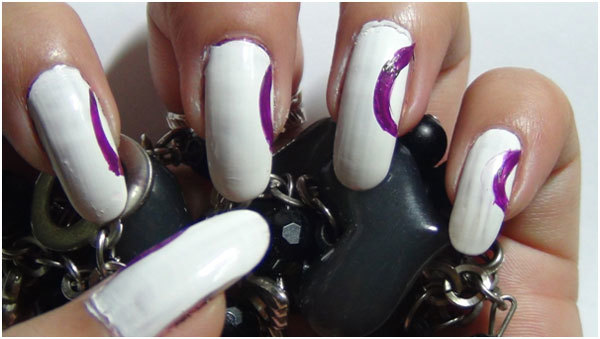
Step 2: Let the white base dry completely. Now take your nail art brush and blue acrylic colour. Draw up the “Disney” font with very steady hands. Make it a bit diagonal to get enough space to draw it. You can use blue nail polish too, but nail polish has a tendency to dry more quickly and so you might not be able to draw the font perfectly. So it’s best to use blue acrylic color.
Nail Art Tutorials 2
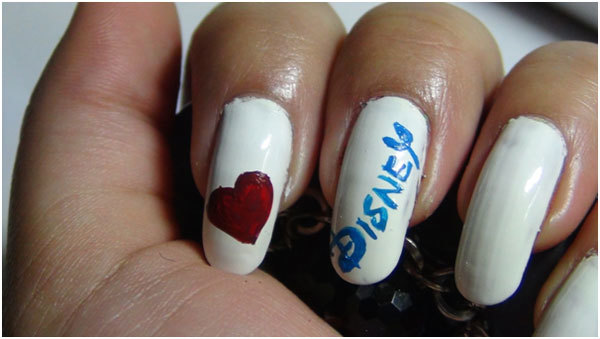
Step 3: Clean your nail art brush and take red acrylic paint. Draw a heart for the first finger.
Nail Art Tutorials 3
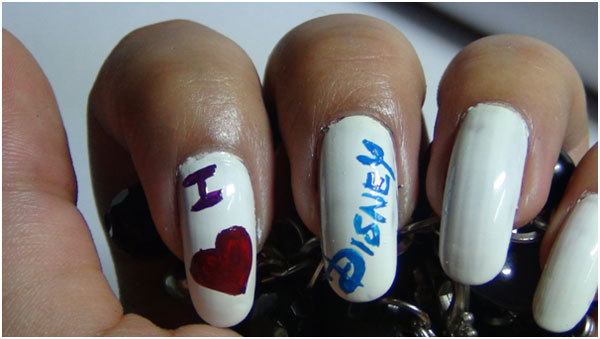
Step 4: Clean your brush and take purple acrylic color. Draw an “I” on top of the heart. You can use red colour for both the “I” and the heart.
Nail Art Tutorials 4
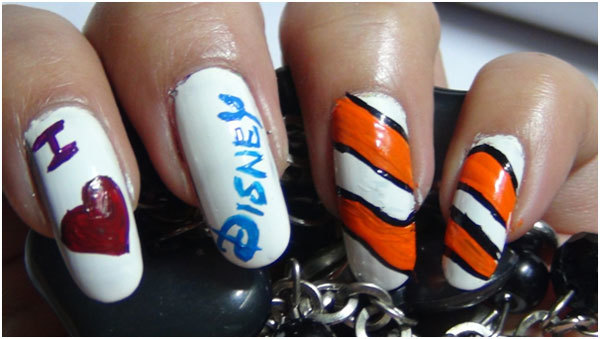
Step5: For the 3rd finger and the last finger, use your nail art brush and orange acrylic color (you can use an orange nail polish too) to draw up broad wavy stripes like below.
Nail Art Tutorials 5
Step6: Take the thin nail art brush and black acrylic colour and give some borders to the stripes. You can also use a black striper.
Nail Art Tutorials 6
[ Read: Nail art brush ]
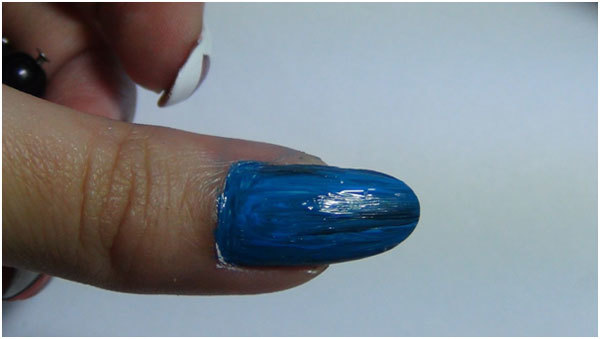
Step7: Use a little bit of blue colour on to the white base colour of the thumb.
Nail Art Tutorials 7
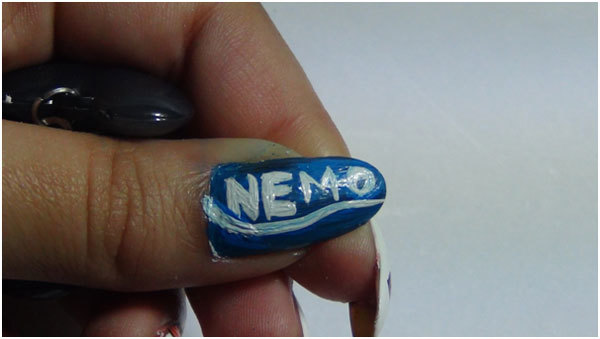
Step8: Take white acrylic colour and your nail art brush. Very carefully and with steady hands, draw up the font “NEMO” and the line below it. It should look something like below.
Nail Art Tutorials 8
Step9: Let the whole design dry completely. Now use a transparent top coat. This design looks very trendy and you can sport it with almost any type of trendy outfits – Tops, jumpsuits, shorts or even short skirts.
Nail Art Tutorials 9
[ Read: Nail art designs ]

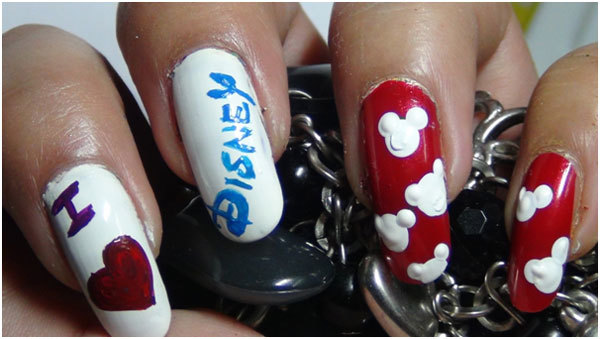
B. Mickey Mouse Disney nails:

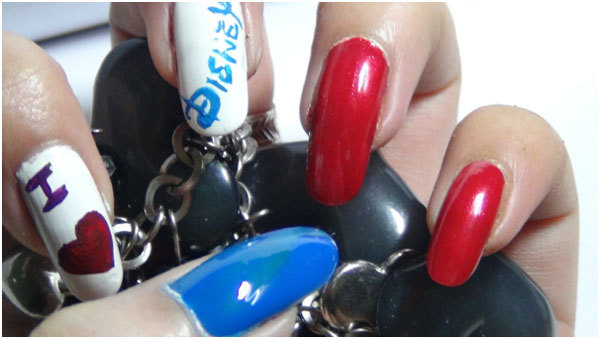
This is another version of Disney nail art designs. I have made the same design on the first 2 nails. I have used red nail polish for the last two finger nails. I have used blue nail polish for the thumb.
Step1: Let the nail polishes dry completely. It should look something like below.
Nail Art Tutorials 10
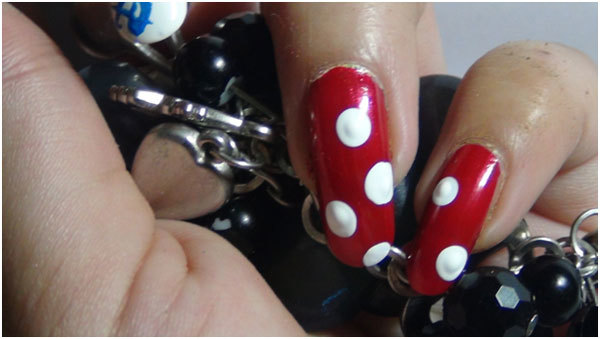
Step2: Use your dotting tool and white acrylic paint. You can also use white nail polish. If you want to keep it simple and don’t want to do a Mickey Mouse pattern, then you can keep it simple with just polka dots on the red base. I preferred to do the Mickey Mouse pattern here. Firstly, put a big dot on the nails. This will act as the face of Mickey Mouse. Do not put too many big white dots because then, there won’t be enough space to make the ears.
Nail Art Tutorials 11
[ Read: Nail Art Spas In Chennai ]
Step3: Now use a small dotting tool or a toothpick and draw the ears like shown below.
Nail Art Tutorials 12
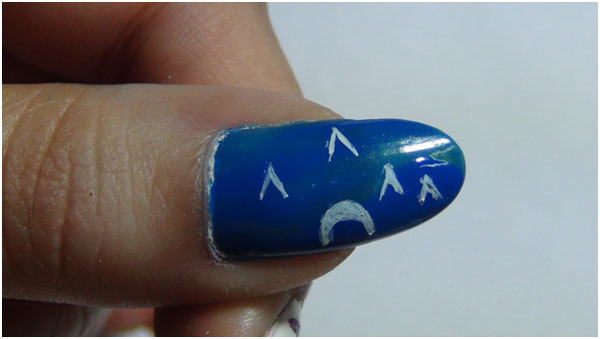
Step4: For the thumb, we will do a Disney castle logo. Start by drawing some triangle shapes and an elongated semi circle at the bottom centre.
Nail Art Tutorials 13
Step5: Complete the castle design by giving some white horizontal lines. Don’t forget the flags on top of the towers. Let this design dry completely. Now use a transparent top coat to seal this beautiful design.
Nail Art Tutorials 14
[ Read: Nail Art Spas In Kolkata ]
Hope you enjoyed both the Disney nail art designs. Give these a try. You can create new designs of your own by permutation and combination of designs like this.

2 Amazing Rainbow Nail Art Tutorials – With Detailed Steps And Pictures

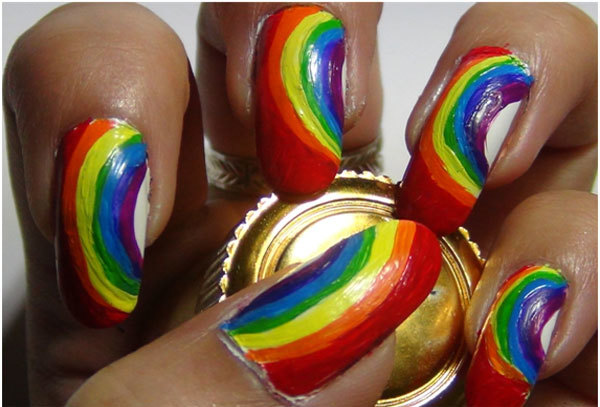
When it rains and there is some sunshine, we often look out of the window to catch a rainbow in the sky. It may be difficult to get a glimpse of rainbow in a busy city but it is not hard to create a rainbow pattern on your nail. Today I will show you two easy ways to do rainbow nail art designs.

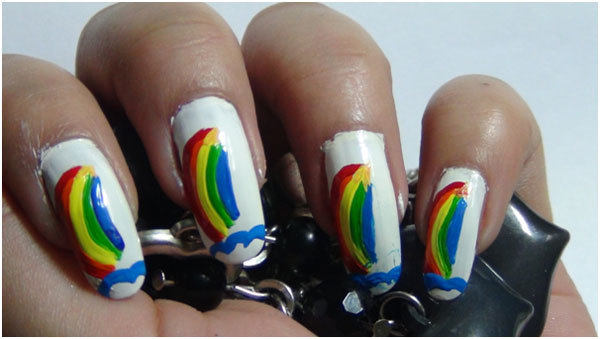
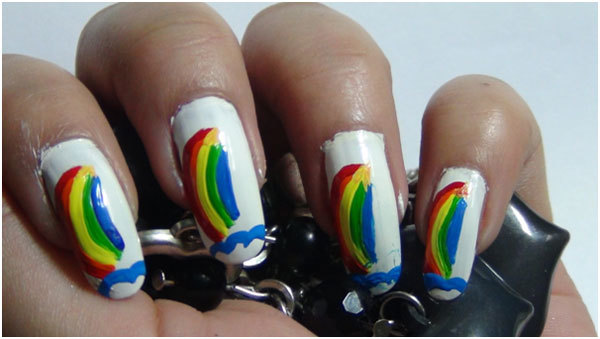
Rainbow Nail Art Tutorials

A. Easy Vibgyor Rainbow Nails:

We all know that a rainbow has 7 colours. So for this rainbow color nail art we will follow the same VIBGYOR sequence of colours and create a lovely rainbow nail art.Things needed:
  • Base coat (optional)
  • White nail polish
  • Acrylic colours in Purple/ violet, indigo, blue, green, yellow, orange and red
  • A thin nail art brush
  • Transparent polish 
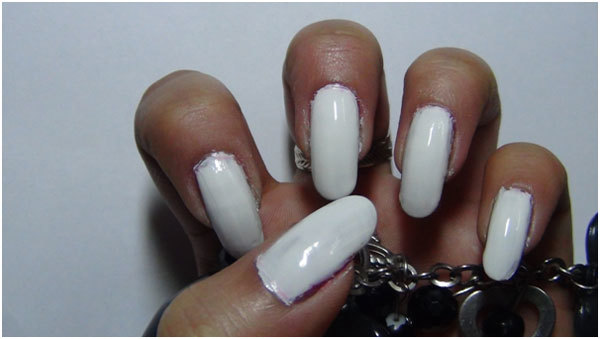
Step 1: Use base coat on your nails to prevent them from chipping and the harmful effects of acrylic paint. Let them dry. Now use two or 3 coats of white nail polish. Let this dry completely before you start using the acrylic paints.
Rainbow Nail Art Tutorials 1
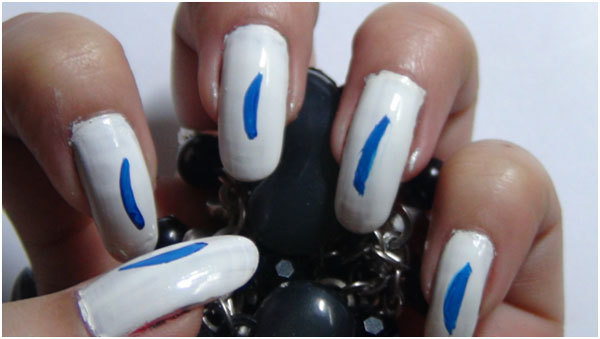
Step 2: Start by drawing a curved line with purple or violet. Follow the VIBGYOR sequence of colours in mind. If you don’t have a perfect indigo colour then mix a little bit of black, white and dark blue to get a dirty blue colour which will act as indigo.
Rainbow Nail Art Tutorials 2
[ Read: Nail art ]
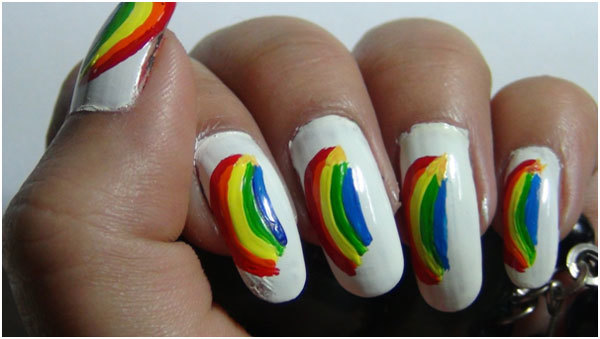
Step 3: When all the 7 colours are used, it will look something like below. Wait for the design to dry completely and only then apply transparent polish. If your acrylic paint is not properly dried, then the colours may bleed and damage the whole design. This is a lovely looking design and is a must try!
Rainbow Nail Art Tutorials 3
[ Read: Nail art brush ]

B. Rainbow Nails with Hearts & Clouds:

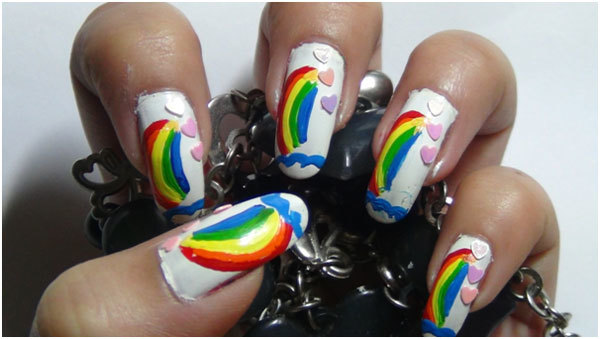
This is an easy cheat-trick for a rainbow nail art design. Here, we will be using some deco material like hearts or stars and we will use five colours instead of seven. This saves time.
Things required:
  • Base coat (optional)
  • White nail polish
  • 5 colours of acrylic paint – Blue, green, yellow, orange and red
  • A thin nail art brush
  • Some small plastic nail art hearts (you can use stars too)
  • A pair of tweezers
  • Transparent polish
Step 1: Use a base coat to prevent your nails from chipping. This will also protect nails from harmful effects of acrylic paints. Let them dry. Put 2 coats of a good white polish. Let this dry completely before using acrylic colours.
Rainbow Nail Art Tutorials 4
Step 2: Start by drawing the rainbow design with the blue colour. Make small curved lines at the centre of the nails. Do not make the first line i.e. the blue one, too long. The last line i.e. red can be more curved and longer. The further you move from blue to green and so on, the lines will become more curved and longer.
Rainbow Nail Art Tutorials 5
Step 3: Complete the rainbow design like I have done below. Use 5 colours in such a way that the colours look like they are emerging from one point. There should be enough space at the side of the rainbow for placing the hearts.
Rainbow Nail Art Tutorials 6
[ Read: Nail Art Spas In Hyderabad ]
Step 4: Take your nail art brush and blue colour. You can use blue nail polish too. I have used blue acrylic colour to paint curved lines at the nail tip. If your nails are short, you can avoid this.
Rainbow Nail Art Tutorials 7
Step 5: Take your transparent polish on a palette. Now use a toothpick to pick up bits of transparent polish and put it on to where you want your plastic hearts to be placed. Do one nail at a time; else the polish will dry before you can place your hearts. Now take a pair of tweezers and place one heart after another. I have placed 3 hearts in a row for each nail.
Rainbow Nail Art Tutorials 8
Step 6: Let the design dry completely. Press the hearts a bit to stick them firmly. Seal your design with a layer or two of a transparent top coat. Here is how it should look.
[ Read: Nail Art Spas In Bangalore ]
Hope you enjoyed both the versions of rainbow nails. You can create other different rainbow pattern nails too. If your nails are short, then you can use just the five colours which are very pronounced in a rainbow – blue, green, yellow, orange and red. This is a cheat trick to get lovely looking rainbow nail art without having to use all 7 colours. Give it a try!
Rainbow Nail Art Tutorials 9

Hypoallergenic Makeup – What Is It And What Are The Top 10 Popularly Used Products?

hypoallergenic makeup
Image: Shutterstock
Sometimes makeup can cause allergic reactions on our skin, leading to skin irritation or rashes. Hypoallergenic makeup is makeup, which when applied on the skin, causes comparatively fewer allergic reactions. This kind of make-up is made up of materials that have fewer chances of leading to allergic reactions. These products are generally fragrance-free as well.
When shopping for makeup, you might have noticed that some bottles and tubes are labeled as ‘hypoallergenic’. This refers to the fact that this particular makeup product was manufactured, keeping in mind that the materials used should cause less or no allergic reactions.
The term ‘hypoallergenic’, however, is not legalized as a trademark. Something labeled ‘hypoallergenic’ does not assure you of the side effects. The decision of purchasing these products wholly depends on the customer.Hypoallergenic Makeup ProductsSome of the best hypoallergenic makeup products that are popularly used are as follows:1. (H) Eyebrow Eye + Brow Liner:These liners are manufactured without any dyes, preservatives or fragrance. It helps in moisturizing the skin, provides sun protection, prevents symptoms of allergy and ensures skin safety.2. Antioxidant 2-Way Powder Foundation:Foundation is one of the basics of makeup. A good foundation is the construction of a good-looking face. This hypoallergenic makeup foundation is a good choice for regular use and it works just like other foundations available in the market.
[ Read: Makeup ]

3. Blush Brush with Bamboo Handle:This product is environment-friendly. The stick of this brush is made of bamboo. The bristles are soft. It picks up color smoothly and the brush is also animal tested and animal hair-free.4. Glitz Lipstick:This lipstick is available in various colors and is a hypoallergenic product. Since it is manufactured with selective ingredients, it does not cause any side effects. The ingredients present in it prevent the formation of rashes or acne on the lips or around it.

[ Read: Lipstick ]

5. Illuminants Brilliant Finish 25 Powder Foundation:This foundation is completely fragrance-free and dye-free. It can be applied on all skin types. This product also contains SPF. As a result, it provides safety from the harmful UV rays of the sun.

6. Lip Glitter Gloss:

This gloss is dermatologist-tested. It is available in a variety of colors. It does not lead to any skin irritation or allergic reactions.
[ Read: Skin ]

7. Harmonie Gentle Soothing Cream:

This product is fragrance-free and also free from other ingredients that might cause allergic reactions. This is an anti-aging cream. This soothing cream is advertised with the claim that on its first application, it helps to calm red and irritated skin. This particular product can also be used on sensitive skin.

8. Revitol:

This is also an anti-aging product. The ingredients used in this product are some of the essential vitamins required for our skin along with some anti-oxidants. This product is not so expensive, so you can easily afford it.

9. Cetaphil:

This is one of the best and most recommended moisturizers by dermatologists for dry skin. It does not contain any fragrance or any other allergic substance. This moisturizer helps to keep your skin smooth and supple. Also, it keeps the skin moisturized for long. It provides a thick layer of moisture to the skin. If you face difficulties with the thick layer, use the lighter version of this product.
[ Read: Night Makeup Tips ]

10. Cliniderm: 

This product is specially formulated for the most sensitive and reactive skin type. It is free of allergic ingredients, fragrances, dyes, lanolin etc that might lead to allergic reactions. Two versions of this product are available in the market – one for use during the summer months and the other for the winter months.
[ Read: Fake Cleavage Using Makeup ]
Have you tried any of these hypoallergenic makeup brands? Are there others you may want to add to the list? Do leave us a comment below.The following two tabs change content below.

10 Beautiful Punjabi Mehndi Designs

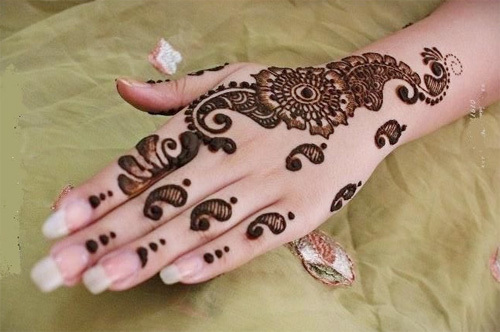
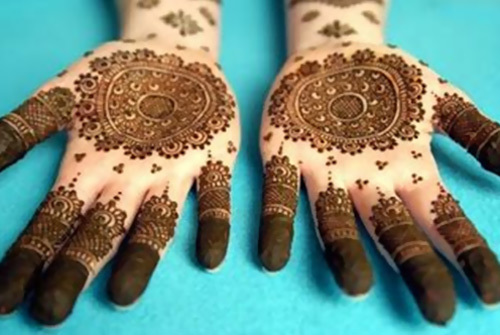
Are you waiting for the wedding season to put on some mehndi? Then wait no more! I think one can get a henna tattoo done any time she wants. A well-designed mehndi can work at all times. Putting mehndi on has become simpler since there are so many salons and even stalls that can apply mehndi on your hands. You do not have to do any work except for cleaning your hand once it is dry.
Once applied, the henna tattoo may last for a while. Yet it is an impermanent body modification that you can easily opt for. There are common designs that you can use when putting on some mehndi. No matter how simple the design is, the color of the mehndi is sure to beautify your hand.
So, go ahead! Get some henna tattoo without waiting for the wedding season. But before getting the henna tattoo done, check out a number of designs that can work for your hands on a daily basis.

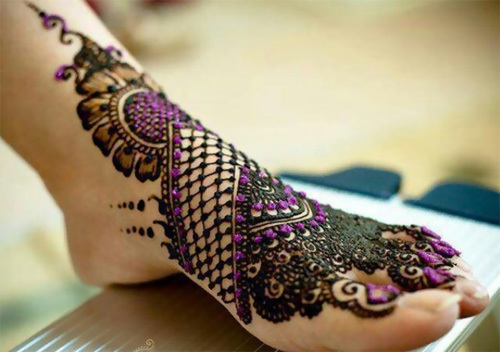
Top 10 Punjabi Mehndi Designs:There are a number of typical designs that are based simply on the kind of design or on the area that the design should be on. Here are a few combinations of punjabi mehndi designs collection that one should try out:

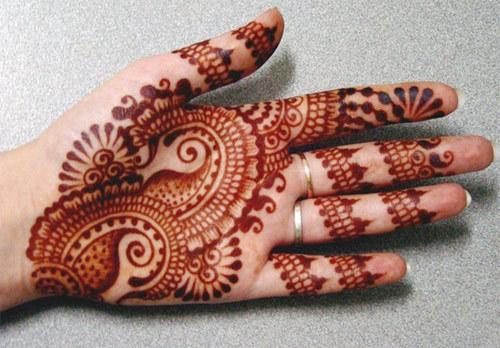
1. Paisley:

paisley
Via pinterest
The paisley is a very common design that is used in various shapes and sizes. You can put a series of small paisleys together to cover a large area. You can also use a large paisley and fill up the inside with other designs. Paisleys can be used on the fingers, the palm and even the rest of the arm. This versatile design can be used to make other designs as well. So, irrespective of which kind of pallet you go for, your mehndi design is sure to include paisley.

2. Curved Lines:

curved lines
Via pinterest
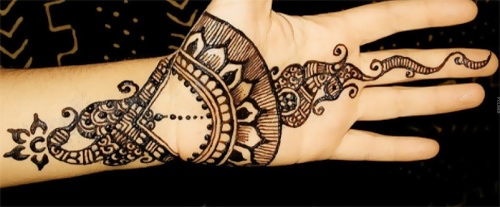
Since mehndi is malleable material, it can easily be used to make curved lines of various shapes and sizes. The curves can be used to make squiggles or elaborate designs. The curved lines can be used to cover large parts of your hand. But the lines are generally used to create larger and more elaborate designs.

3. Dots:

dots
Via pinterest
The most basic design, which I had created the first time I applied mehndi by myself, was made mostly of dots. Even if you are not using a mehndi cone, you can easily make dots. The dots can also be used to make larger designs.

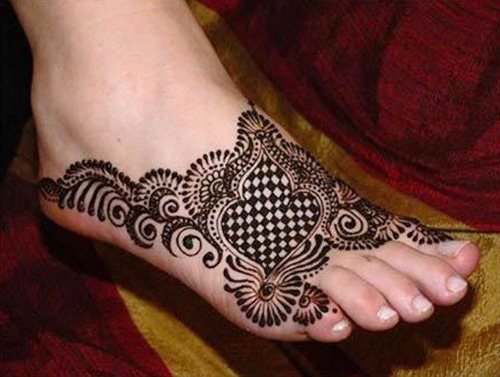
4. Checkers:

checkers
Via pinterest
There is something very aesthetic about checkers that draw my attention. By using the mehndi you can easily create checkered designs. You can also use this design to shade and detail a larger design.
[Read:Mehndi Artists In Delhi]

5. Flowers:

flowers
Via pinterest
Flowers are the sign of fertility and beauty. The design of flowers can also help you make your mehndi look beautiful. You can include a large number of flower designs of different shapes and sizes in your mehndi.

6. Leaves:

leaves
Via pinterest
Leaves may look similar to paisleys. But they can be very different. One can use the designs of leaves to construct an elaborate design.

7. Peacock:

peacock
Via pinterest
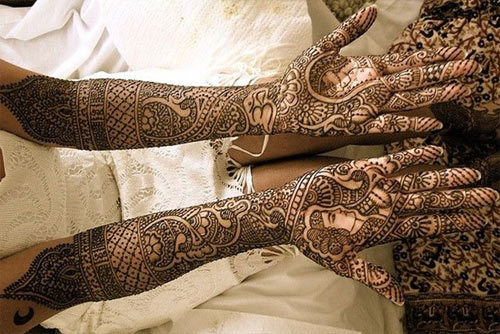
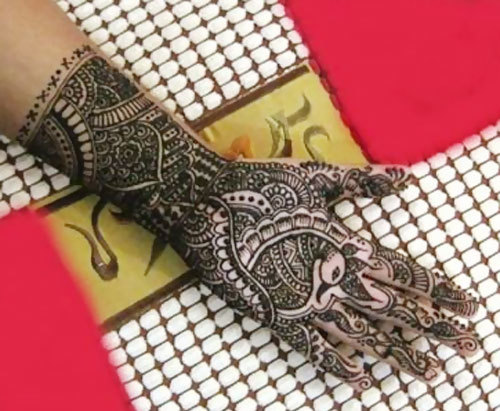
The peacock is a very common design used for the Punjabi wedding mehndi. The bride generally has flamboyant peacock mehndi tattooedon. The design involves a large number of basic designs, like the paisley, flowers, leaves, spots, checkers and curved lines. You can put a peacock on your palm or can make it more flamboyant.

8. Loops and Spirals:

loops and spirals
Via pinterest
Circular shapes can offer a new dimension to your mehndi design. You can use circles to create loops. You can even use spirals to create more designs.
[Read:Mehndi Artists In Bangalore]

9. Colors:

colors
Via pinterest
Punjabi mehndi is known for using a large number of colors. What can make mehndi look more alluring than colors?

10. Bling:

bling
Via pinterest
If you are planning to go big on your wedding mehndi, you can find ways of adding glimmer to your Punjabi bridal mehndi designs. Though the glitters will go away after a few washes, they are certainly worth it on your big day!
Hope you liked the post. Do leave your comments below.